Our birch tree

Activity
Start with the P4C task (see below). It helps students sort properties and classify them. From this, you will most likely figure out what a tree is, come up with the terms for the parts of a tree, and the difference between deciduous and coniferous trees.
If you haven't talked about the seasons, it might be a good idea to do so first. Connect it to what activities the students do during the different seasons, what the temperature is like, when the students have birthdays and other anniversaries.
March : Take pictures of the entire tree and the parts of the tree that can be photographed now. Also take pictures of the winter buds. Insert the pictures into Book Creator and enter the terms and date when the picture was taken.
April/May : Follow the birch closely during this time, almost daily, to be able to take pictures of the birch as the buds burst and the birch "gets mouse ears". Take a picture of the entire tree from the same angle as in March and a close-up of the buds and the rachis. This is when the birch is in bloom, and the rachis are the birch's flowers. When in bloom, the birch spreads large amounts of pollen. Try turning on the rachis and see what happens (pollen allergy sufferers should stand out of the wind). It can also be observed as yellow dust on cars, on the ground and elsewhere. Those with pollen allergies notice it too. Continue logging in Book Creator. If you want to make birch sap, you must tap off the sap just before the buds burst. (see description) . Birch sap can also be made from the rachis, or these can be dried into tea. The leaves are edible. Feel free to taste them
May/June: Take a picture of the entire tree from the same angle as last time and a close-up of the leaves. Feel free to taste the leaves now that they are fully developed as well. If you want to make whisk, it must be done now while the sap is still rising, until St. Hans.
August-October: Take photos of the entire tree and close-ups of the leaves. At some point, the leaves will start to change color. And eventually the leaves will fall off. Continue to document with photography. See if you can also record the formation of winter buds throughout the winter.
Tips and traps
Choose a tree that is close enough that it can be easily visited daily. It may also be a good idea to mark the "photo spot" so that the photos are taken from exactly the same place. If you are going to tap sap, take branches or bark for fists, you must have permission from the landowner. The catkins spread pollen because they are the birch's flowers and there are both female and male catkins on the same tree. After flowering, the birch sets seeds. These may also be interesting to look at more closely. Contact similar grade levels elsewhere in the country and compare dates for the different phases.
Background knowledge and fun facts
The birch has been and is an important plant. Both leaves, sap, bark (bark) and wood have been used for medicine, tools, heating and construction. The birch has also been among the plants that have warned about the weather and growing conditions. For example, the gardener knows that it is time to prune the roses when the birch sprouts. The distribution of birch is increasing, both as a result of climate change and as a result of less grazing in the open fields. There are between four and five billion birch trees in Norway – a thousand trees for every Norwegian.
Useful links
Birch as a resource in the forest – natursekken.no – program for grades 5-7, but many tips to find.
Follow a tree through the seasons – environmental education – European project to record changes in a tree.
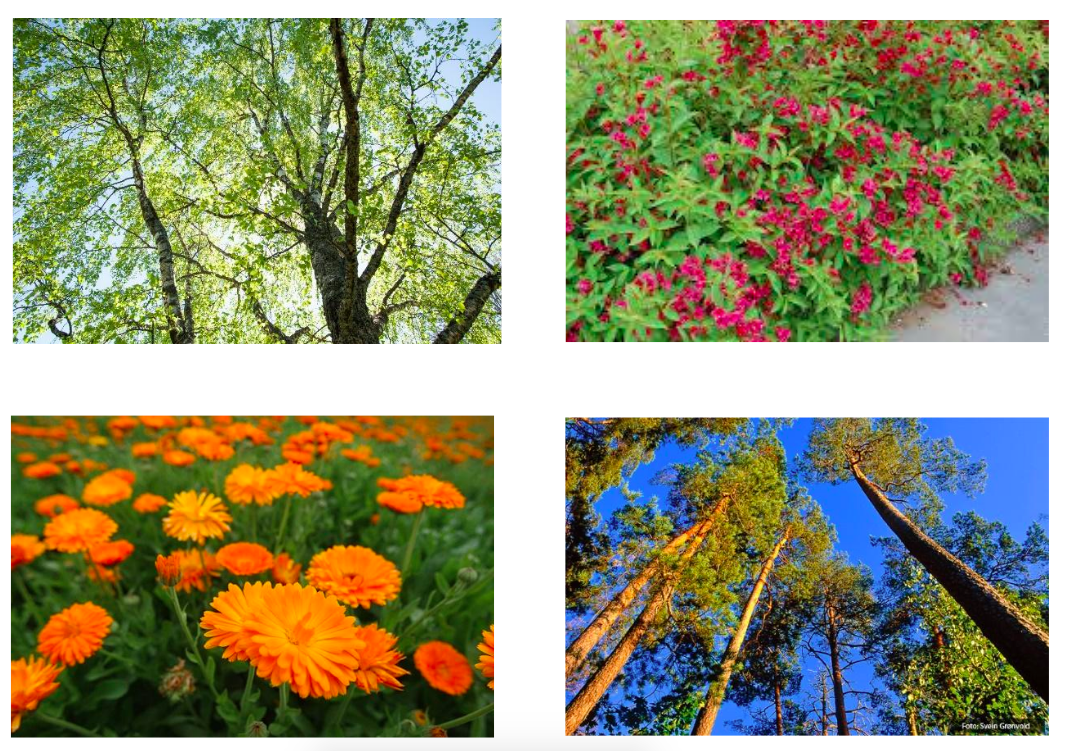
The P4C task – Who is going out?
There is no answer. Students argue why they think one picture is different from the other three.